Durapost Installation Guide

Durapost Installation Guide: This comprehensive guide provides a step-by-step approach to successfully installing Durapost systems. We’ll explore the advantages of Durapost over traditional materials, cover necessary tools and site preparation, and guide you through the installation process, from excavation to concrete curing and final inspection. This guide is designed to equip you with the knowledge and confidence needed for a safe and efficient installation, resulting in a durable and long-lasting structure.
Understanding the unique properties of Durapost and following best practices is crucial for achieving optimal results. This guide covers various aspects, including selecting the right Durapost type for your project, preparing the site adequately, and addressing common installation challenges. By the end, you will possess the expertise to tackle your Durapost installation with ease and precision.
Introduction to Durapost Installation: Durapost Installation Guide
Source: ytimg.com
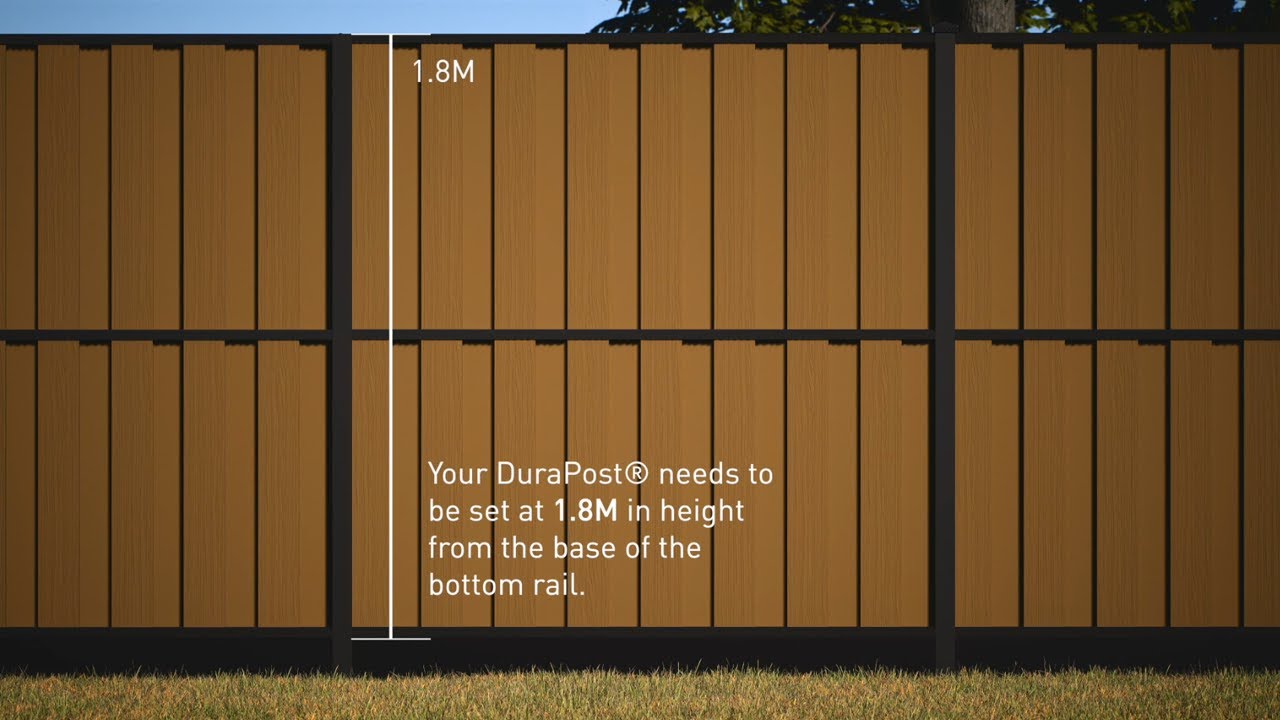
Durapost systems offer a robust and durable solution for various fencing and support applications. These systems utilize high-strength, galvanized steel posts designed for longevity and ease of installation. Compared to traditional wooden posts, which are susceptible to rot and insect damage, or less durable materials like vinyl, Durapost provides superior strength, resistance to weathering, and a longer lifespan, minimizing long-term maintenance costs. Durapost technology originated from a need for a more reliable and sustainable alternative to traditional fencing materials, evolving to incorporate advancements in steel manufacturing and design for improved performance and installation efficiency.
Tools and Materials Required
Source: co.uk
Having the correct tools and materials readily available is crucial for a smooth and efficient Durapost installation. The following table lists the essential items. Ensure all materials meet specified dimensions and quality standards before commencing installation.
| Tool Name | Description | Quantity | Supplier (if applicable) |
|---|---|---|---|
| Post Hole Digger | Manual or powered auger for excavating post holes. | 1 | Local hardware store |
| Shovel | For leveling the ground and removing loose soil. | 1-2 | Local hardware store |
| Level | Ensure posts are plumb and vertical. | 1 | Local hardware store |
| Measuring Tape | For accurate spacing and depth measurements. | 1 | Local hardware store |
| Concrete Mixer | For mixing concrete (manual or powered). | 1 | Local hardware store or rental |
| Wheelbarrow | For transporting concrete and materials. | 1 | Local hardware store or rental |
| Tamper | For compacting soil and concrete. | 1 | Local hardware store |
| Safety Glasses | Eye protection during excavation and concrete work. | 1 | Local hardware store |
| Work Gloves | Hand protection during excavation and concrete work. | 1 pair | Local hardware store |
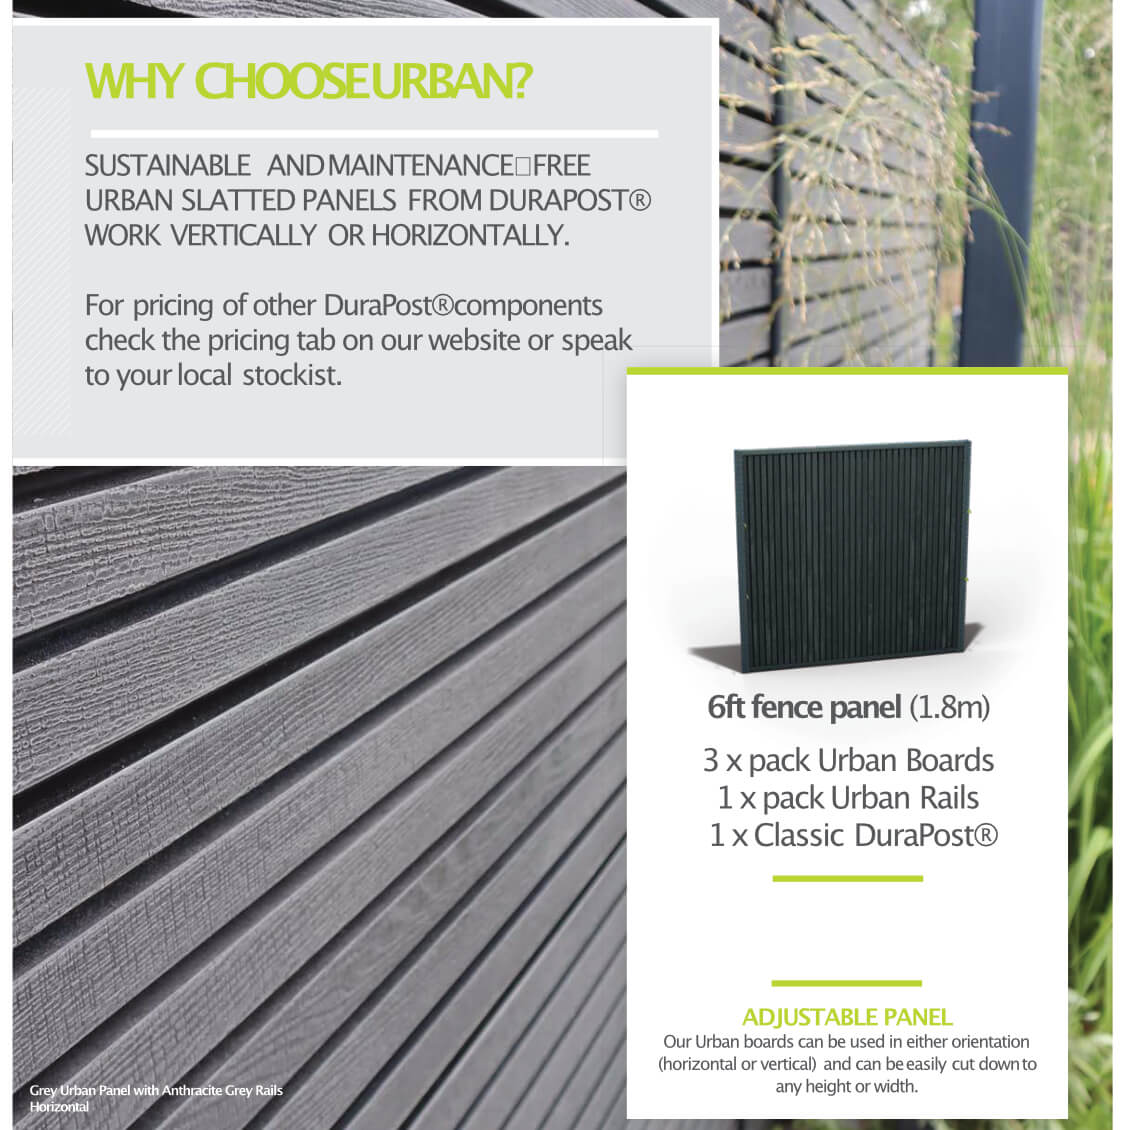
Durapost offers various post types, including different heights, diameters, and galvanization thicknesses, catering to diverse project needs. Specifications are available from the Durapost manufacturer or supplier and should be carefully reviewed before purchase. A comprehensive materials checklist, including the number of posts, concrete quantity, and other components, should be created and verified before commencing work.
Site Preparation and Planning
Proper site preparation is paramount for a successful Durapost installation. Careful planning minimizes complications and ensures the longevity of the finished structure. Thorough site surveying identifies potential obstacles and allows for accurate planning.
Survey and mark the installation area, accounting for existing structures, underground utilities, and terrain variations. Use string lines and stakes to establish accurate post locations. For uneven terrain, adjust hole depths to ensure consistent post height above ground. Compacted or rocky soil may require specialized excavation techniques.
Post Hole Excavation and Preparation

Source: co.uk
The dimensions of post holes depend on soil type, post size, and local regulations. Generally, holes should be at least twice the diameter of the post and deep enough to provide adequate support. Loose soil may require wider holes to prevent settling. Different excavation methods exist; manual digging is suitable for smaller projects, while power augers are more efficient for larger installations. Use a level to ensure each hole is plumb and accurately spaced according to the site plan.
Durapost Installation Process, Durapost installation guide
Installing Durapost is a straightforward process when followed correctly. Precise alignment and depth are crucial for structural integrity and longevity.
- Excavate Post Holes: Dig holes to the specified dimensions, ensuring they are plumb and accurately spaced.
- Place Durapost: Carefully lower each Durapost into its hole, ensuring it’s vertical using a level. Adjust as needed.
- Check Alignment: Double-check the alignment of each post before proceeding with concrete filling.
- Prepare Concrete: Mix the concrete according to the manufacturer’s instructions, ensuring the correct water-cement ratio for optimal strength.
- Fill Post Holes: Pour concrete into each hole, ensuring it surrounds the Durapost and fills the hole to the desired level. Use a tamper to remove air pockets and ensure even compaction.
- Cure Concrete: Allow the concrete to cure for the recommended time (usually several days) to achieve maximum strength. Keep it moist during the curing process to prevent cracking.
Concrete Filling and Curing

Source: co.uk
The correct concrete mix is vital for ensuring the long-term stability of the Durapost installation. The ideal ratio should be determined based on the manufacturer’s recommendations and local conditions. Typically, a 1:2:3 ratio of cement, sand, and gravel is a common starting point, but adjustments may be needed for specific soil types. Proper concrete filling involves pouring the mix slowly and steadily to prevent voids around the post. Vigorous tamping removes air pockets, ensuring optimal bond between the post and concrete. Curing involves keeping the concrete moist during the initial setting period to prevent cracking and achieve maximum strength. This can be done by covering the concrete with damp burlap or plastic sheeting.
Post-Installation Inspection and Maintenance
A thorough post-installation inspection ensures the installation meets specifications and identifies any potential issues. Regular maintenance contributes to the longevity of the Durapost system.
Inspect all posts for plumbness, alignment, and stability. Check the concrete for any cracks or signs of settling. Routine maintenance includes checking for any damage or loosening over time. Address any issues promptly to prevent further problems. Potential problems include settling due to poor soil compaction, corrosion in harsh environments, and damage from impacts. Solutions include re-compacting soil, applying protective coatings, or repairing damaged sections.
Troubleshooting Common Installation Issues
Source: co.uk
Various problems can arise during Durapost installation. Understanding these issues and their solutions facilitates efficient problem-solving.
| Problem | Solution |
|---|---|
| Post not plumb | Re-excavate, adjust post position, and refill with concrete, ensuring proper leveling. |
| Concrete settling | Ensure proper soil compaction before pouring concrete and use a higher concrete strength mix if necessary. |
| Uneven post spacing | Recheck measurements and correct spacing before proceeding with concrete. |
| Cracked concrete | Ensure proper curing process to prevent rapid drying and cracking. |
Safety Precautions During Installation
Safety is paramount during Durapost installation. Adhering to safety procedures minimizes the risk of accidents and injuries.
- Wear appropriate personal protective equipment (PPE), including safety glasses, work gloves, and sturdy footwear.
- Be aware of underground utilities before excavating. Call your local utility companies to locate underground lines.
- Use caution when operating power tools, following all manufacturer’s instructions.
- Ensure proper lifting techniques to avoid back injuries when handling heavy materials.
- Keep the work area clear of obstructions to prevent tripping hazards.
- Always follow safe excavation practices, including shoring and sloping where necessary.
A comprehensive safety plan should be developed before commencing the installation, considering all potential hazards and implementing appropriate control measures. Regular safety briefings for all personnel involved are recommended.
Q&A
What is the lifespan of a properly installed Durapost?
With proper installation and maintenance, Duraposts can last for many decades, offering exceptional longevity compared to alternative materials.
Can I install Duraposts in different soil types?
Yes, but the installation process may need adjustments depending on the soil conditions. The guide details how to account for variations in soil types.
What happens if I encounter unexpected underground obstacles during excavation?
If you encounter unexpected obstacles, such as rocks or utilities, immediately stop work and contact a qualified professional for assistance. Safety is paramount.
What type of concrete is best for Durapost installations?
The guide specifies the recommended concrete mix ratio for optimal results. Using the correct mix ensures proper setting and long-term stability.
Are there any warranty considerations related to Durapost installation?
Warranty information should be obtained directly from the Durapost supplier. Proper installation is usually a condition of any warranty.
Comments are closed.