Fix Snapped Fence Post
Fix Snapped Fence Post: A broken fence post can be a frustrating eyesore, compromising the integrity of your entire fence line. This guide provides a step-by-step approach to repairing or replacing damaged posts, regardless of the material—wood, metal, or vinyl—and the severity of the break. We’ll explore various repair methods, material choices, and preventative measures to ensure a long-lasting and sturdy fence.
From assessing the damage and choosing the right materials to executing the repair and preventing future issues, we cover everything you need to know to tackle this common home repair project successfully. Whether you’re a seasoned DIY enthusiast or a novice homeowner, this comprehensive guide will equip you with the knowledge and confidence to restore your fence to its former glory.
Assessing Fence Post Damage and Selecting Repair Methods
Repairing a snapped fence post requires a systematic approach. Begin by carefully assessing the damage to determine the best repair strategy. This involves understanding the extent of the break, the post material, and the surrounding environment. Proper assessment is crucial for choosing the right materials and methods for a successful and lasting repair.
Damage Assessment
Source: org.uk
A thorough assessment of the damage is the first step. This involves determining the severity of the break (completely or partially broken), the type of break (clean or splintered), and the material of the fence post (wood, metal, or vinyl). Consider the soil type – clay soils can exert more pressure on posts – and prevailing weather conditions, such as recent heavy rains or strong winds, which might indicate the potential for further damage. The surrounding environment should also be evaluated to determine if there are any factors contributing to the damage that need to be addressed to prevent future incidents.
Fence Post-Repair Methods Comparison
The choice of repair method depends on the post material and the severity of the damage. The following table compares different repair methods:
| Method | Material Suitability | Cost | Difficulty |
|---|---|---|---|
| Metal Sleeve/Bracket | Wood, Metal | Low to Moderate | Low to Moderate |
| Splicing (Wood Glue & Screws) | Wood | Low | Low |
| Post Replacement | Wood, Metal, Vinyl | Moderate to High | Moderate to High |
| Welding | Metal | Moderate to High | High |
| Metal Clamps/Brackets | Metal | Low to Moderate | Low |
Choosing Repair Materials and Tools
Selecting the appropriate materials and tools is essential for a successful repair. The choice of materials will depend on the type of fence post and the repair method chosen. Proper tools ensure efficient and safe work.
Repair Materials
Suitable materials for repairing a snapped fence post include:
- Wood: Pressure-treated lumber for longevity, matching the existing post’s dimensions.
- Metal: Galvanized steel or aluminum sleeves, brackets, or replacement posts for corrosion resistance.
- Concrete: Quick-setting concrete mix for setting new posts, ensuring rapid stabilization.
- Fasteners: Galvanized screws, bolts, and nails for secure connections; consider using stainless steel fasteners in coastal areas to resist corrosion.
Concrete Mix Comparison

Source: ytimg.com
Different concrete mixes offer varying setting times and strengths. Quick-setting mixes are ideal for immediate stabilization, while standard mixes provide a more gradual cure. The choice depends on the urgency of the repair and environmental conditions. For example, a quick-setting mix might be preferable in freezing temperatures to prevent the concrete from freezing before setting.
Necessary Tools

Source: helpfulcolin.com
The necessary tools vary depending on the repair method but may include:
- Post hole digger or auger
- Shovel
- Level
- Measuring tape
- Hammer or mallet
- Screwdriver or drill
- Wrench (if using bolts)
- Welding equipment (if applicable)
- Safety glasses and gloves
Optimal Support Brace Placement
A simple diagram illustrating optimal support brace placement would show braces angled from the ground towards the post, positioned approximately one-third and two-thirds of the way up the post’s length, providing maximum stability. These braces should be securely fastened to both the post and the ground using appropriate fasteners and methods.
Repairing Wooden Fence Posts: Fix Snapped Fence Post
Repairing a wooden fence post involves different techniques depending on the extent of the damage. Methods range from simple splicing to complete replacement.
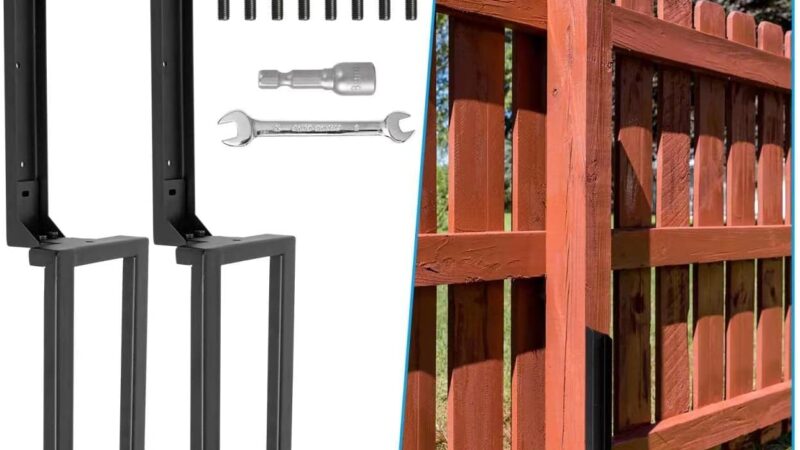
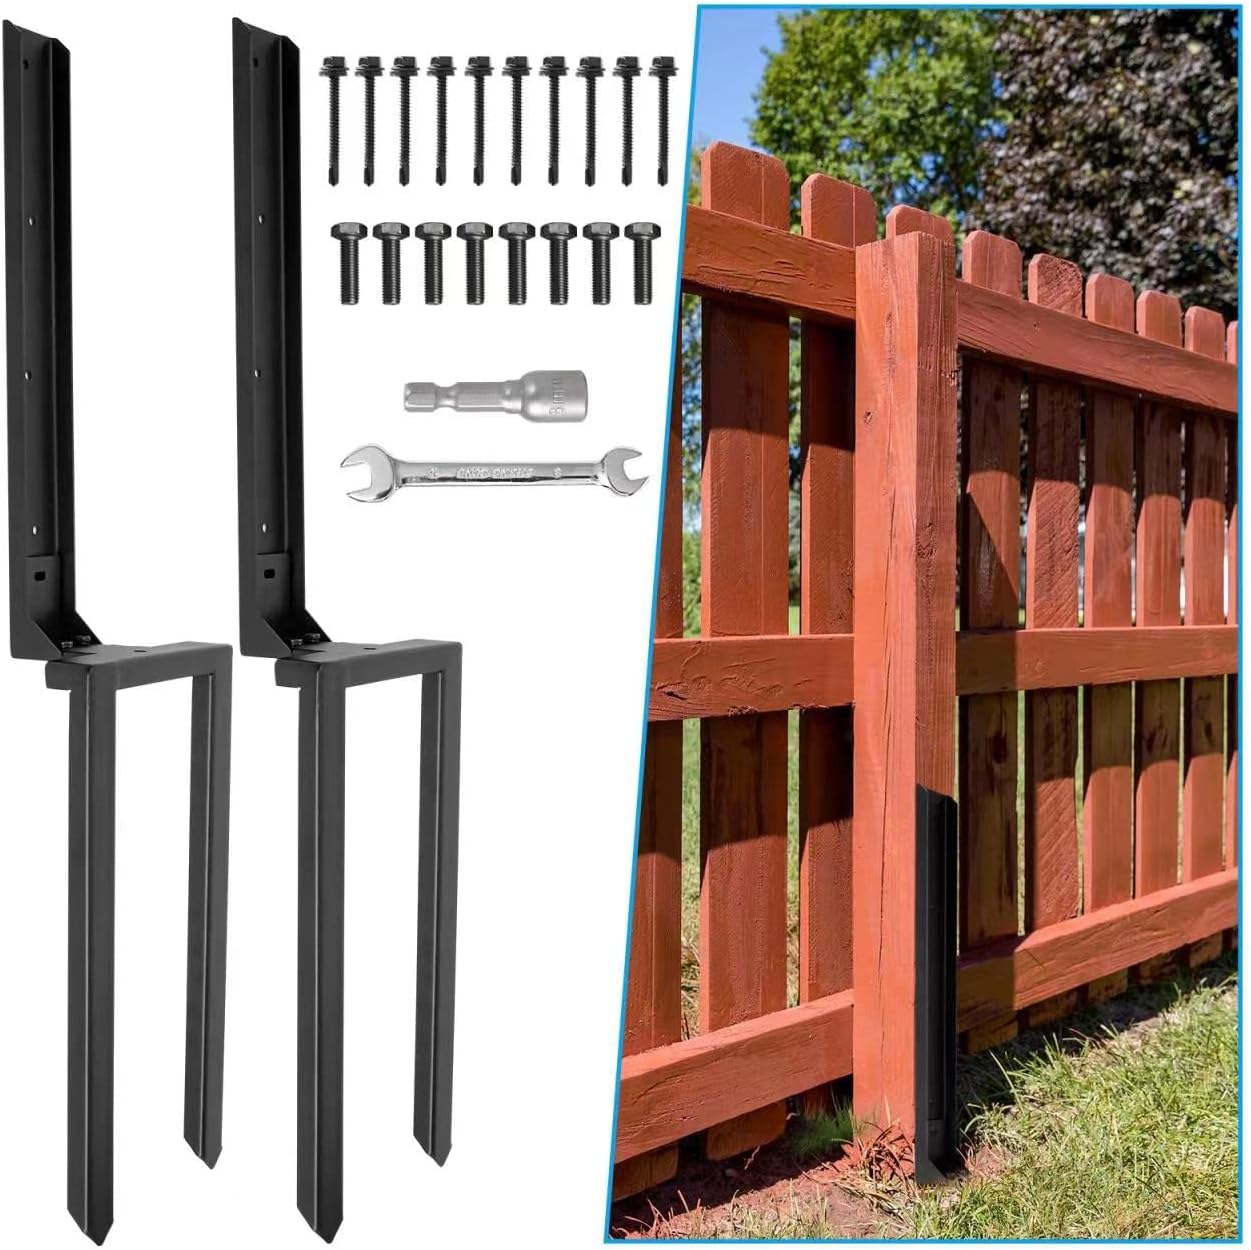
Repairing with a Metal Sleeve or Bracket
This method is suitable for partially broken posts. Align the broken pieces, slide a metal sleeve over the break, and secure it with screws or bolts. Ensure a snug fit to prevent movement. For less severe cracks, a metal bracket can be used to reinforce the weak point.
Splicing a Broken Wooden Post, fixing a snapped fence post.
For a clean break, carefully align the broken ends, apply wood glue liberally, and clamp them together. Reinforce the splice with several long screws driven at an angle to maximize holding power. Allow the glue to cure completely before removing the clamps.
Replacing a Completely Broken Wooden Post
Dig out the old post, ensuring the hole is deep and wide enough for the new post. Set the new post in the hole, ensuring it’s plumb (perfectly vertical) and at the correct depth. Backfill the hole with compacted soil or concrete for stability. For added stability, consider adding support braces.
Preparing the Hole for a New Wooden Post
The hole should be at least three times the diameter of the post and deep enough to ensure at least one-third of the post is below ground level. This provides ample support and resistance to shifting or uprooting. Compacting the soil around the base of the post is crucial to prevent settling.
Repairing Metal Fence Posts
Metal fence posts offer durability but can also suffer damage. Repair methods vary depending on the type and severity of damage.
Welding a Broken Metal Fence Post

Source: ytimg.com
Welding is a suitable repair method for clean breaks in metal posts. Clean the broken ends, align them precisely, and weld them together using appropriate welding techniques and safety precautions. Ensure a strong, solid weld to maintain structural integrity.
Using Metal Clamps or Brackets
For bent or slightly snapped metal posts, metal clamps or brackets can be used to reinforce the weak point. Securely fasten the clamps or brackets using bolts to restore stability and prevent further damage. Ensure proper alignment before tightening the fasteners.
Replacing a Damaged Metal Post
Removing a damaged metal post can be challenging. Use a post puller or leverage tools to remove the post from the ground. Ensure the hole is properly cleaned before setting the new post. Set the new post plumb and secure it using concrete or compacted soil.
Removing an Old Metal Post
A step-by-step guide would include: 1) Digging around the base of the post to expose it fully. 2) Using a post puller or leverage tools to loosen the post. 3) Carefully remove the post, ensuring no damage is caused to surrounding posts or landscaping. 4) Cleaning the hole thoroughly before installing the new post.
Repairing Vinyl Fence Posts
Vinyl fence posts present unique challenges due to their material properties. Repair options are limited, often necessitating replacement.
Challenges and Limitations of Repairing Snapped Vinyl Posts
Vinyl’s brittle nature makes repairs difficult. Welding or gluing is generally ineffective. Attempts at patching often lead to a weakened and unsightly repair. Therefore, replacement is usually the most practical solution.
Replacing a Damaged Vinyl Post
Carefully remove the damaged post, ensuring no damage surrounding posts. Prepare the hole, ensuring proper depth and width. Set the new vinyl post plumb, using concrete or compacted soil for stability. Ensure the post is level and securely fastened.
Securing a New Vinyl Post
Use a suitable concrete mix for setting the post, ensuring it’s properly mixed and placed to provide adequate support. Allow the concrete to cure completely before applying any strain to the post. Proper compaction of the soil around the post is also crucial for stability.
Precautions When Working with Vinyl Fence Posts
- Avoid excessive force to prevent cracking or breakage.
- Use appropriate tools to avoid scratching or damaging the vinyl surface.
- Work carefully to avoid accidental damage to adjacent posts.
- Handle vinyl posts gently to prevent breakage during installation.
Preventing Future Fence Post Breakage
Preventing future fence post breakage involves understanding the causes of damage and implementing preventive measures during installation and maintenance.
Common Causes of Fence Post Breakage
Common causes include: extreme weather conditions (strong winds, heavy snow, freezing and thawing cycles), poor installation (inadequate depth, loose soil, improper bracing), animal damage (rodents gnawing at the base, impacts from larger animals), and age and deterioration of materials.
Selecting Appropriate Fence Post Materials and Sizes
Choose materials and sizes appropriate for the environmental conditions. In areas prone to strong winds or heavy snow, use larger, stronger posts made of durable materials like pressure-treated wood or metal. Consider the soil type when choosing post-depth and support methods.
Proper Installation of Fence Posts
Proper installation is crucial. Ensure posts are set to the correct depth, using adequate concrete or compacted soil for support. Use appropriate bracing to enhance stability. Check for level and plumpness during installation.
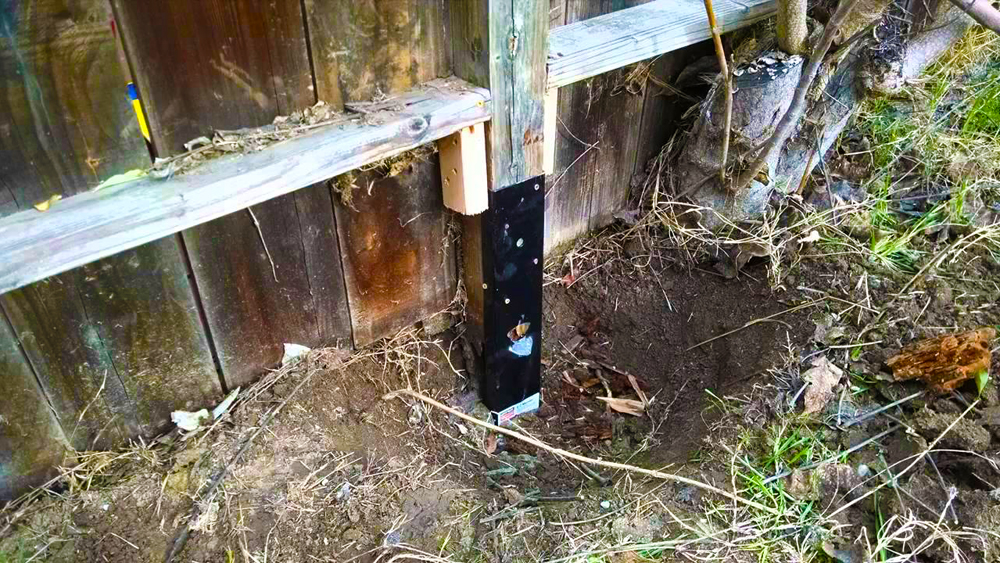
Fence Maintenance for Durability
Source: media-amazon.com
Regular inspections can help identify potential problems early. Address any loose soil or damaged areas promptly. Repair or replace damaged sections before they worsen. Consider applying protective coatings to wood posts to extend their lifespan.
FAQ Overview
What type of post is easiest to repair?
Wooden posts are generally the easiest to repair, offering options like splicing or using metal sleeves. Metal posts can be welded or braced, while vinyl posts are usually best replaced due to their fragility.
How deep should I bury a new fence post?
The ideal depth depends on the post height and soil conditions, but generally, at least one-third of the post’s length should be buried. Consult local building codes for specific requirements.
What if I can’t identify the type of post material?
Carefully examine the post for markings or characteristics. If unsure, consult a local hardware store or fencing professional for assistance in material identification.
Can I use regular concrete for setting a new post?
While possible, quick-setting concrete is generally recommended for faster setting and improved stability. Regular concrete may require longer curing times.
How long does it take for concrete to fully cure?
This depends on the type of concrete and weather conditions but usually takes at least 24-48 hours for initial setting and several days for full curing.
Comments are closed.