How To Wash A Vinyl Fence
How to wash a vinyl fence might seem straightforward, but achieving a truly pristine finish requires careful planning and technique. This guide delves into the process, from selecting the right cleaning solutions and tools to mastering pressure washing and manual scrubbing techniques. We’ll explore how to tackle stubborn stains, ensure thorough rinsing, and maintain your fence’s beauty for years to come. Learn the secrets to a sparkling clean vinyl fence that enhances your property’s curb appeal.
This comprehensive guide will walk you through each step, providing detailed instructions and helpful tips to ensure your vinyl fence looks its best. Whether you’re a seasoned DIY enthusiast or a first-timer, you’ll find the information here invaluable in achieving professional-looking results.
Preparing Your Vinyl Fence for a Thorough Cleaning
Proper preparation is key to achieving a sparkling clean vinyl fence. This section Articulates the necessary tools and materials, pre-cleaning steps, and the ideal environmental conditions for optimal cleaning results. A well-prepared cleaning process minimizes effort and maximizes the effectiveness of your cleaning efforts.
Necessary Tools and Cleaning Solutions
Gathering the right tools and cleaning solutions beforehand streamlines the cleaning process. The choice of cleaning solution depends on the level of dirt and grime present. Below is a comparison of common options:
| Cleaning Solution | Pros | Cons | Suitable For |
|---|---|---|---|
| Mild Dish Soap | Gentle, readily available, inexpensive | May not be effective against stubborn stains or mildew | Light dirt and grime |
| Bleach Solution (diluted) | Effective against mildew and stubborn stains | Can discolor vinyl if used improperly, harsh on skin and plants | Mildew, tough stains (use with caution) |
| Specialized Vinyl Cleaner | Formulated for vinyl, often effective on various stains, may leave a protective coating | More expensive than other options | In most cleaning situations, especially for maintaining a protective layer |
Pre-Cleaning Preparation
Before beginning the wash, it’s crucial to prepare the fence. This involves removing loose debris and assessing its condition for any significant damage.
- Remove any loose debris such as leaves, twigs, and cobwebs using a broom or leaf blower.
- Inspect the fence for any damaged sections, loose boards, or significant stains. Addressing these issues before washing can prevent further damage.
- Protect any nearby plants or landscaping with drop cloths or plastic sheeting to avoid accidental damage from cleaning solutions or high-pressure water.
Optimal Cleaning Time and Weather Conditions
The time of day and weather conditions significantly impact the cleaning process. Choosing the right time ensures efficient cleaning and prevents unwanted outcomes.
- Avoid direct sunlight: Cleaning in direct sunlight can cause the cleaning solution to dry too quickly, leaving streaks and requiring more effort.
- Choose a cloudy day or a time of day with shade: This allows the cleaning solution to remain wet and work effectively.
- Avoid cleaning during rain or when rain is imminent: This prevents the cleaning solution from being washed away prematurely and ensures complete drying time.
Washing Your Vinyl Fence
This section details the washing process using both pressure washers and manual methods. Remember to always test any cleaning solution in an inconspicuous area first to check for discoloration or damage.
Washing with a Pressure Washer, How to wash a vinyl fence

Source: ytimg.com
Pressure washers offer efficient cleaning, but improper use can damage the vinyl. Always use the appropriate pressure setting and nozzle.
- Begin by mixing your chosen cleaning solution according to the manufacturer’s instructions.
- Apply the cleaning solution to the fence using a garden sprayer or a low-pressure nozzle on the pressure washer.
- Allow the solution to dwell for a few minutes to loosen dirt and grime.
- Use a wide-angle nozzle (25-40 degrees) on your pressure washer at a low-pressure setting (1500-2000 PSI). Maintain a distance of 12-18 inches from the fence.
- Work systematically, section by section, rinsing thoroughly as you go.
- Avoid holding the nozzle in one spot for too long, as this can damage the vinyl.
Washing Without a Pressure Washer
Manual cleaning is a gentler alternative to pressure washing, suitable for smaller fences or areas with delicate vinyl. It requires more physical effort but minimizes the risk of damage.
- Mix your cleaning solution as instructed.
- Apply the solution to the fence using a soft-bristled brush or sponge.
- Scrub gently, using a back-and-forth motion. Avoid harsh scrubbing that could scratch the vinyl.
- Rinse thoroughly with a garden hose, ensuring all cleaning solution is removed.
Cleaning Stubborn Stains and Mildew
For persistent stains or mildew, a more targeted approach may be necessary. Always test any solution in an inconspicuous area first.
- For mildew, a diluted bleach solution (always following safety precautions) can be effective. Apply, let it dwell, and then scrub gently.
- For stubborn stains, consider using a specialized vinyl cleaner or a paste of baking soda and water. Apply, let it dwell, and scrub gently.
- For paint splatters, carefully scrape off excess paint with a plastic scraper before applying a suitable cleaning solution.
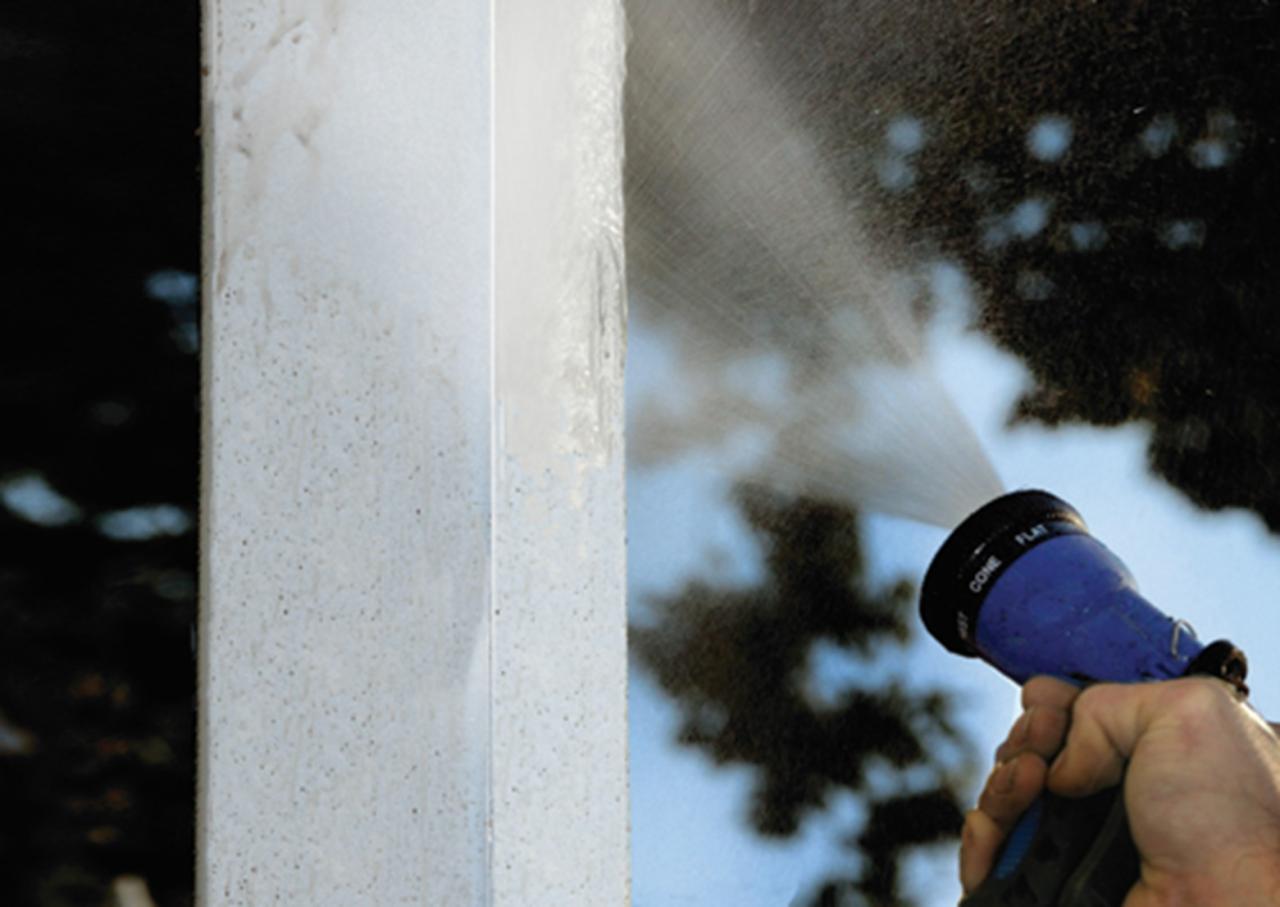
Rinsing and Drying Your Vinyl Fence: How To Wash A Vinyl Fence
Proper rinsing and drying are crucial for preventing streaking and ensuring a clean, long-lasting finish. Avoid harsh drying methods to prevent damage.
Rinsing Technique

Source: projectperfecthome.com
Thorough rinsing removes all traces of the cleaning solution, preventing residue build-up and potential discoloration. Use a gentle spray from a garden hose or a low-pressure setting on a pressure washer, ensuring complete coverage. Overlap your rinsing passes slightly to prevent missed areas.
Air Drying
Allowing the fence to air dry naturally is the safest and most effective method. Avoid using high-heat methods like pressure washers on high settings or blow dryers, as these can warp or damage the vinyl. Direct sunlight should also be avoided during the drying process.
Appearance of a Clean Fence
A properly cleaned and dried vinyl fence displays a uniform color, free from streaks or residue. The surface is smooth and even to the touch, with a renewed vibrancy in its color. Any previously present stains or mildew are completely removed, leaving the fence looking fresh and new.
Post-Cleaning Maintenance

Source: wikihow.com
Regular maintenance extends the life and beauty of your vinyl fence. A simple schedule and proactive measures can prevent future cleaning challenges.
Maintenance Tips
Regularly inspect your fence for any signs of damage, discoloration, or mildew. Address these issues promptly to prevent them from worsening. Consider using a vinyl protectant to help repel dirt and grime, making future cleaning easier.
Maintenance Schedule
| Month | Task |
|---|---|
| Every Month | Quick inspection for damage or debris; remove any loose debris with a broom or leaf blower. |
| Every 3 Months | Wash down with a garden hose and mild soap if necessary. |
| Every 6-12 Months | Thorough cleaning as described above, depending on environmental conditions. |
Addressing Potential Problems
Source: wambamfence.com
Discoloration can be caused by mildew, prolonged exposure to harsh weather, or improper cleaning solutions. Damage can result from physical impact or improper pressure washing. Prompt attention to these issues can prevent more extensive problems.
Illustrative Examples
This section provides detailed examples of challenging cleaning scenarios and the results of different cleaning methods.
Challenging Stain Removal: Mold Growth
A large area of persistent mold growth on a north-facing section of the fence was treated by first scrubbing with a solution of diluted bleach and water (following all safety precautions). After allowing the solution to dwell for 15 minutes, the area was scrubbed gently with a soft-bristled brush. Finally, the area was rinsed thoroughly and allowed to air dry. The mold was completely removed, restoring the fence’s original color and appearance.
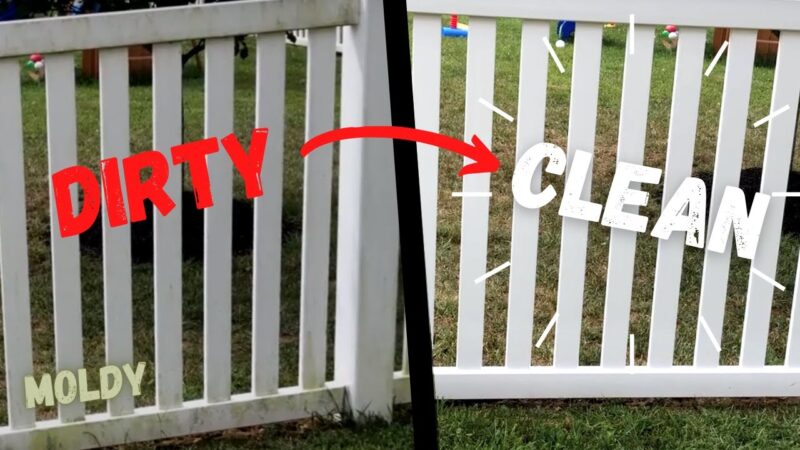
Before and After Cleaning: Visual Comparison

Source: ytimg.com
Before cleaning, the fence appeared dull and faded, with streaks of dirt and several patches of mildew. The color was muted and the surface texture felt slightly rough. After cleaning, the fence displayed a vibrant, even color. The surface was smooth and clean to the touch, with a renewed shine. The previously noticeable dirt and mildew were completely gone, revealing the fence’s original beauty.
Pressure Washer vs. Manual Cleaning
A section of the fence was cleaned using a pressure washer, while an adjacent section was cleaned manually using a brush and mild soap. The pressure washer method resulted in a faster, more efficient cleaning, but there was a slight risk of damage. The manually cleaned section took longer but resulted in a gentle, thorough clean without any risk of damage. Both methods effectively removed dirt and grime, but the pressure washer left a slightly cleaner result, especially in the crevices.
User Queries
Can I use a wire brush to clean my vinyl fence?
No, avoid using wire brushes or abrasive materials as they can scratch the vinyl surface.
How often should I wash my vinyl fence?
A yearly cleaning is generally sufficient, but more frequent cleaning may be needed depending on your climate and environmental conditions.
What should I do if I notice discoloration after washing?
Discoloration could be due to improper cleaning solutions or prolonged sun exposure. Try a different cleaner and consider using a UV protectant.
Can I use a garden hose to rinse the fence instead of a pressure washer?
Yes, a garden hose can be used for rinsing, but a pressure washer offers more efficient cleaning power for stubborn dirt.
What if I accidentally damage my vinyl fence during cleaning?
Minor scratches are usually cosmetic. For significant damage, consult a vinyl fence repair specialist.
Comments are closed.