Vinyl Picket Fence Installation
Vinyl picket fence installation offers a beautiful and low-maintenance solution for enhancing your property’s curb appeal. This guide provides a comprehensive overview of the process, from initial planning and site preparation to the final touches and ongoing maintenance. We’ll explore the advantages of vinyl over other materials, detail the necessary tools and techniques, and address common challenges to ensure a successful installation. Whether you’re a seasoned DIYer or a first-time installer, this guide will equip you with the knowledge and confidence to create a stunning and durable vinyl picket fence.
We will cover various aspects, including choosing the right materials, preparing the ground, setting posts effectively, attaching fence sections securely, and adding finishing touches like gates. Safety is paramount, and we’ll highlight essential safety precautions throughout the installation process. By the end, you’ll have a clear understanding of how to complete this project efficiently and safely, resulting in a beautiful fence that will last for years.
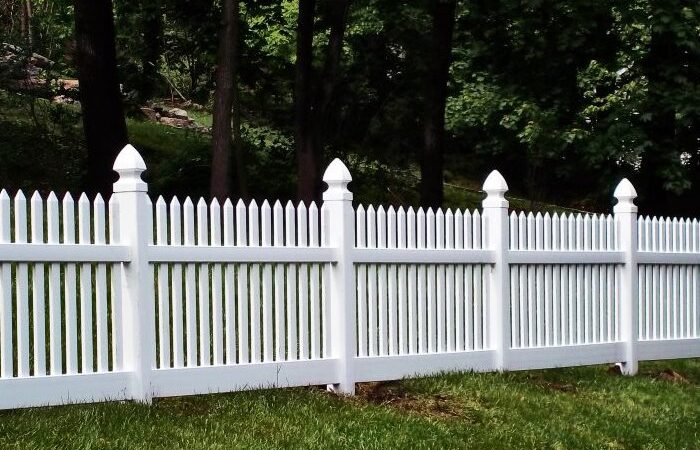
Vinyl Picket Fence Installation

Source: vinylfencefittings.com
Installing a vinyl picket fence offers a blend of beauty and practicality. Vinyl’s low-maintenance nature, durability, and attractive aesthetic make it a popular choice for homeowners. This guide provides a comprehensive overview of the installation process, from initial planning to final touches, ensuring a successful project.
Advantages of Vinyl Picket Fences
Compared to wood or metal, vinyl picket fences boast several key advantages. Vinyl is exceptionally durable, resisting rot, insect damage, and warping. It requires minimal maintenance, needing only occasional cleaning. Furthermore, vinyl fences come in a variety of styles and colors, offering aesthetic flexibility to complement any home’s design. The longevity of vinyl also contributes to its cost-effectiveness over the long term, despite potentially higher initial investment.
Step-by-Step Installation Overview
The vinyl fence installation process can be broken down into several key stages: site preparation and planning, installing fence posts, attaching fence sections, adding finishing touches, and addressing potential challenges. Each stage requires careful attention to detail to ensure a structurally sound and aesthetically pleasing fence.
Necessary Tools and Materials
Before beginning, gather the necessary tools and materials. This includes post hole diggers or a post hole auger, concrete mix, level, measuring tape, safety glasses, work gloves, post supports (concrete or sleeves), vinyl fence sections, fasteners (screws or clips), and a gate (if desired) along with its hardware. Having all materials readily available streamlines the installation process.
Site Preparation and Planning
Accurate measurements and thorough planning are crucial for a successful fence installation. Proper ground preparation ensures the fence’s stability and longevity. This section details best practices for ensuring a solid foundation for your new fence.
Accurate Measurements and Planning
Begin by carefully measuring the perimeter where the fence will be installed. Mark the location of each post using stakes and string. Consider any existing landscaping features, utility lines, and property lines to avoid obstructions and ensure compliance with local regulations. A detailed plan, including post-placement and gate locations, prevents costly mistakes during the installation.
Ground Preparation for Fence Post Placement
Proper ground preparation is essential for stable post-placement. Remove any vegetation, rocks, or debris from the areas where posts will be installed. Loosen the soil to allow for easier post-setting and better concrete compaction (if using concrete). The ground should be level and free from obstructions to ensure the fence remains straight and secure.
Ground Conditions and Post-Setting Methods
| Ground Condition | Post-Setting Method | Advantages | Disadvantages |
|---|---|---|---|
| Hard, compacted soil | Concrete | Provides excellent stability | Requires more effort and time |
| Loose, sandy soil | Ground sleeves | Easy installation | May require additional support in extreme weather |
| Rocky soil | Concrete with rock anchors | Provides strong support in difficult conditions | More complex and potentially costly |
| Clay soil | Concrete with a gravel base | Improves drainage and stability | Requires careful compaction |
Installing Fence Posts
Setting the fence posts correctly is fundamental to the fence’s structural integrity. This section explores different methods for setting posts, highlighting their advantages and disadvantages.
Methods for Setting Fence Posts
Two common methods for setting fence posts are using concrete and ground sleeves. Concrete provides superior stability, particularly in challenging soil conditions. Ground sleeves offer a quicker and easier installation, suitable for less demanding environments. The choice depends on factors such as soil type, budget, and desired level of stability.
Advantages and Disadvantages of Post-Setting Methods
Concrete offers superior stability and longevity but requires more time and effort. Ground sleeves provide a faster installation but may be less stable in challenging soil conditions. Consider the specific site conditions and your skill level when choosing a method. For example, rocky soil might necessitate using concrete with rock anchors for better stability.
Ensuring Proper Post Depth and Alignment
Posts should be set to the recommended depth specified by the manufacturer. Using a level ensures vertical alignment, crucial for a straight fence line. Incorrect depth or alignment can lead to sagging or instability over time. Proper post depth also protects the posts from frost heave and ensures long-term stability.
Attaching the Vinyl Picket Fence Sections
Once the posts are securely in place, the next step involves attaching the vinyl fence sections. This requires careful attention to detail to ensure a neat and aligned fence.
Attaching Fence Sections to Posts, Vinyl picket fence installation
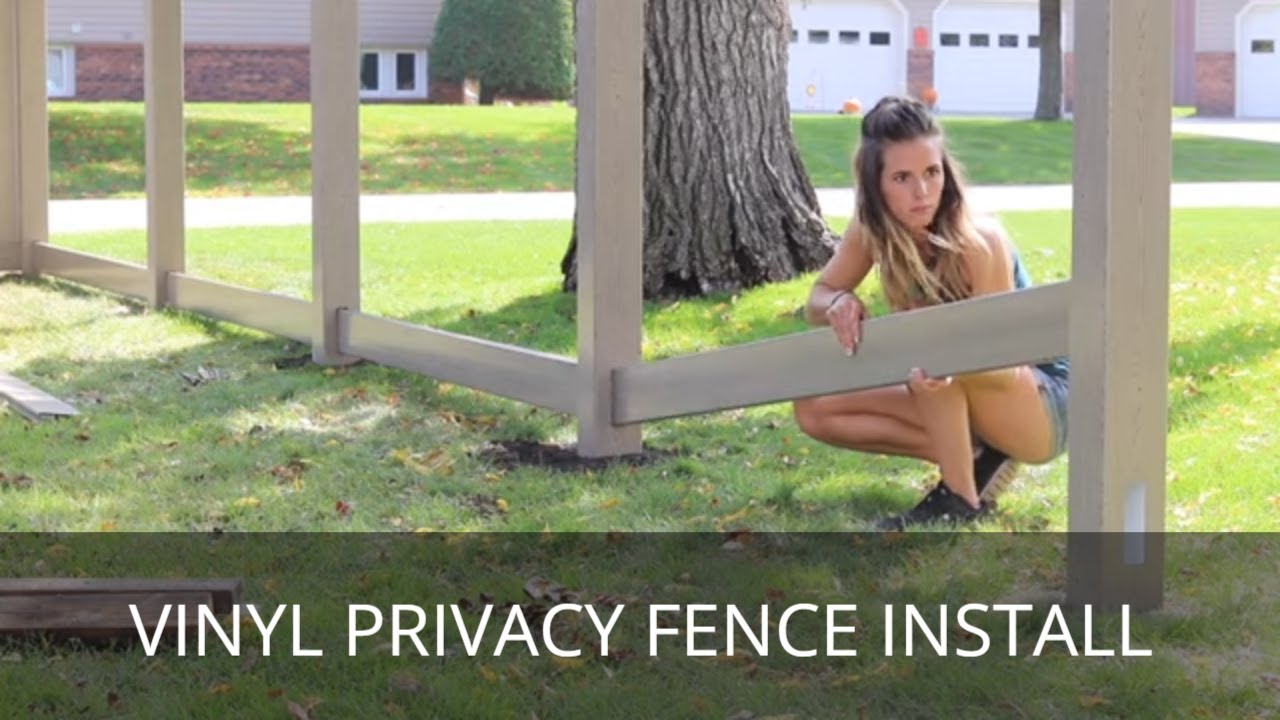
Source: ytimg.com
Typically, vinyl fence sections are attached to posts using screws or clips. Screws offer a strong and permanent connection, while clips allow for easier section removal if necessary. Always follow the manufacturer’s instructions for specific attachment methods and fastener types.
Using Different Types of Fasteners
Screws provide a secure and rigid connection, ideal for areas with high wind exposure. Clips offer a more flexible solution, simplifying repairs or replacements. The choice depends on individual preferences and site conditions. Using the right fasteners is essential for maintaining the fence’s structural integrity.
Step-by-Step Guide with Image Descriptions
1. Positioning the first section: Carefully align the first fence section with the post, ensuring it is level and plumb. (Image description: A close-up showing the first section being carefully aligned against the post, using a level to check for plumpness.) 2. Securing the section: Attach the section to the post using screws or clips, following the manufacturer’s instructions. (Image description: A detailed view showing the screws or clips being used to secure the fence section to the post.) 3. Repeating the process: Continue attaching sections to the posts, maintaining consistent spacing and alignment. (Image description: A wider shot showing multiple sections already attached, demonstrating consistent spacing and alignment.) 4. Final check: After completing the installation, perform a final check for levelness and alignment. (Image description: A view of the completed fence section, highlighting the even spacing and alignment of the fence sections.)
Finishing Touches and Maintenance
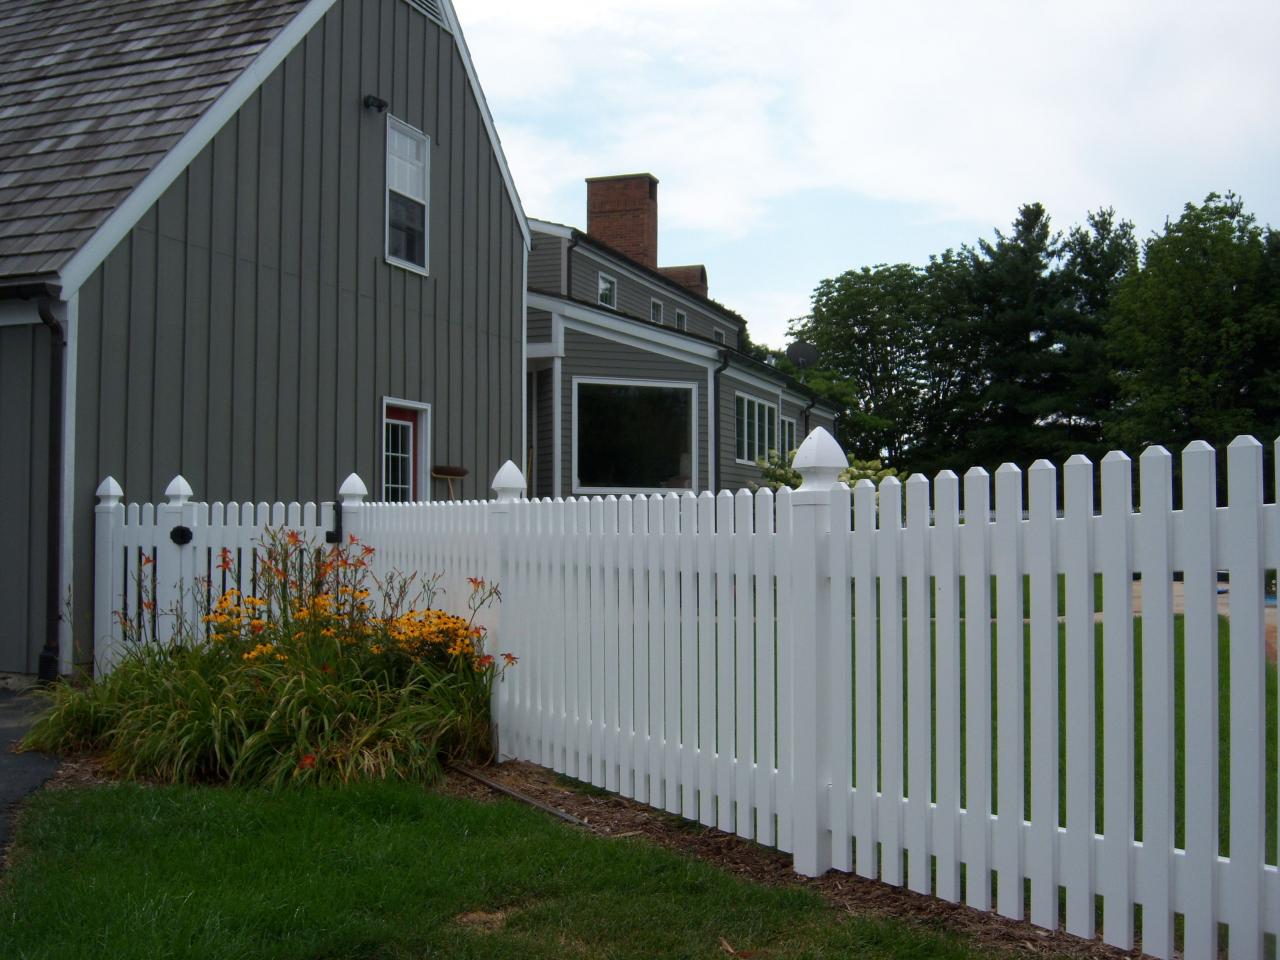
Source: pinimg.com
Once the fence is installed, adding finishing touches and implementing a maintenance plan ensures its longevity and aesthetic appeal.
Installing Gates and Gate Hardware
Gate installation requires careful measurement and alignment to ensure proper function. Follow the manufacturer’s instructions for installing the gate posts and hinges. Properly installed gate hardware ensures smooth operation and prevents sagging or binding.
Maintaining the Appearance and Longevity of the Vinyl Fence

Source: ytimg.com
Regular cleaning with soap and water removes dirt and debris. Avoid using harsh chemicals or abrasive cleaners. Occasional rinsing with a garden hose can help maintain the fence’s appearance. Proper maintenance will extend the life of your vinyl fence and maintain its aesthetic appeal.
Common Installation Problems and Solutions
Common problems include uneven posts, misaligned sections, and difficulty with gate operation. Using a level during installation helps prevent uneven posts. Careful planning and precise measurements reduce misalignment. Lubricating gate hinges can resolve operational difficulties. Addressing these issues promptly ensures a functional and attractive fence.
Advanced Installation Techniques
Installing fences on sloped terrain or incorporating corner posts requires specialized techniques to maintain structural integrity and aesthetic appeal.
Installing Fences on Sloped Terrain
For sloped terrain, adjust post heights to follow the contour of the land. This might involve using varying post lengths or building steps into the fence line. Consult with a professional for complex slopes to ensure structural stability.
Installing Corner Posts and End Posts
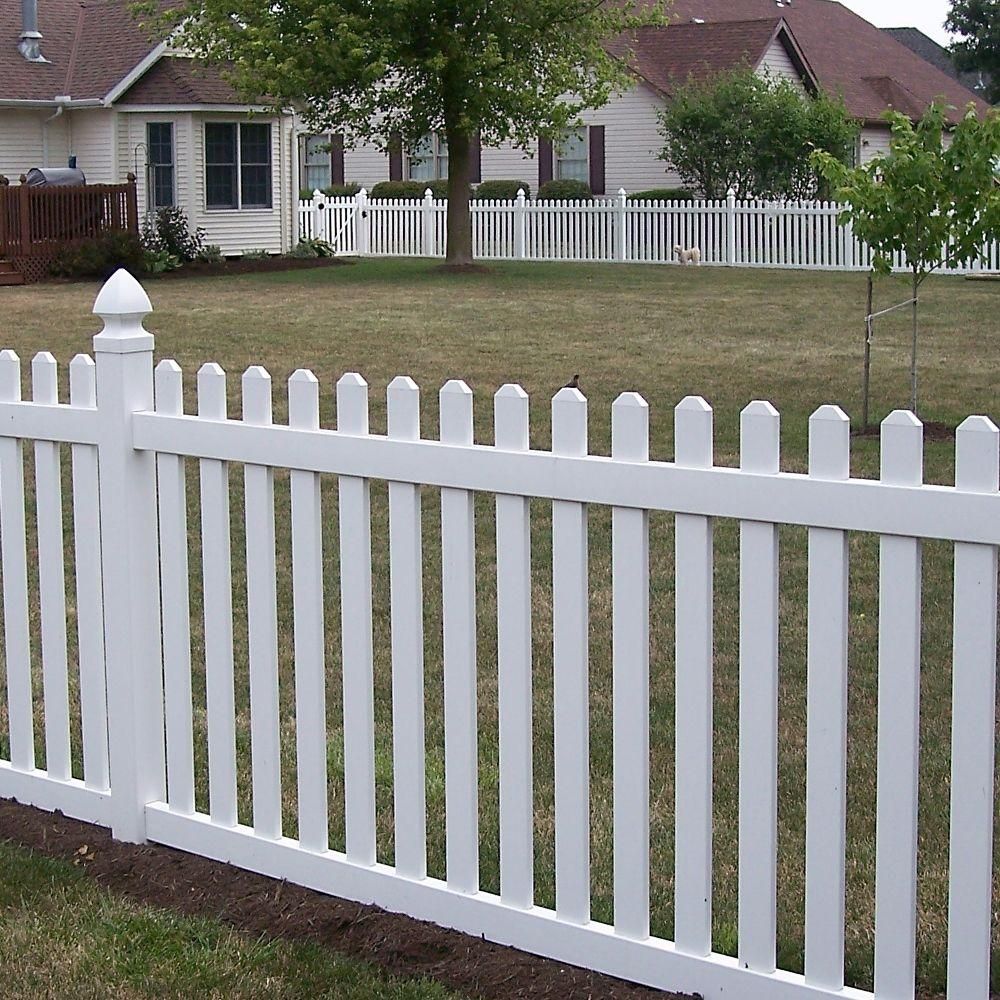
Source: pinimg.com
Corner posts and end posts require extra support to withstand lateral forces. Reinforce these posts using additional bracing or concrete footings. Ensure that these posts are properly aligned to maintain a neat and professional look.
Tips for Working with Different Types of Vinyl Fencing
- Always follow the manufacturer’s instructions for specific installation details.
- Use appropriate fasteners for the type of vinyl fencing being installed.
- Ensure proper alignment and spacing between fence sections.
- Regularly inspect the fence for any damage or loose components.
Safety Considerations During Installation
Fence installation involves potential hazards; prioritizing safety is crucial. This section emphasizes safe handling practices and the use of appropriate safety equipment.
Potential Hazards Associated with Fence Installation
Hazards include cuts from sharp tools, back injuries from lifting heavy materials, and eye injuries from flying debris. Working at heights can also pose a risk of falls. Proper planning and precautions mitigate these risks.
Best Practices for Safe Handling of Tools and Materials

Source: campanellafence.com
Always use tools correctly and according to their intended purpose. Wear appropriate safety gear, including gloves, safety glasses, and sturdy footwear. Lift heavy materials using proper lifting techniques to avoid back injuries. Use caution when working with power tools.
Proper Use of Safety Equipment
Safety glasses protect eyes from flying debris. Work gloves prevent cuts and abrasions. Sturdy footwear provides ankle support and protects against injuries. Hearing protection may be necessary when using noisy power tools. Using appropriate safety equipment is crucial for a safe and successful installation.
Query Resolution: Vinyl Picket Fence Installation
What type of concrete is best for setting fence posts?
A quick-setting concrete mix designed for exterior use is recommended for optimal strength and durability.
How often should I clean my vinyl fence?
Regular cleaning with soap and water, as needed, will keep your fence looking its best. A pressure washer can be used, but avoid using high pressure directly on the fence surface.
Can I install a vinyl fence on uneven ground?
Yes, but it may require additional steps such as leveling the ground or using adjustable post bases to ensure a straight fence line.
What is the warranty on most vinyl fencing?
Warranties vary by manufacturer, but many offer lengthy warranties, often covering material defects for 10-25 years or more. Check with your supplier for specifics.
How do I repair a damaged vinyl picket?
Minor scratches can often be buffed out. For more significant damage, replacement pickets may be necessary. Consult your fence manufacturer’s instructions.
Comments are closed.